Chapter 0: Setup
In this section, you will import the base Adventure Quest project into Unity. Before starting, you should ensure you have Unity 2021.3.XX. Although this project may work with other versions, it has not been tested.
Table of contents
01. Get the Project Template
You can access the project template on GitHub here: LINK
Option 1 - Using GitHub (Recommended)
- If you have a GitHub account, select
Use this Template>Create a new Repository
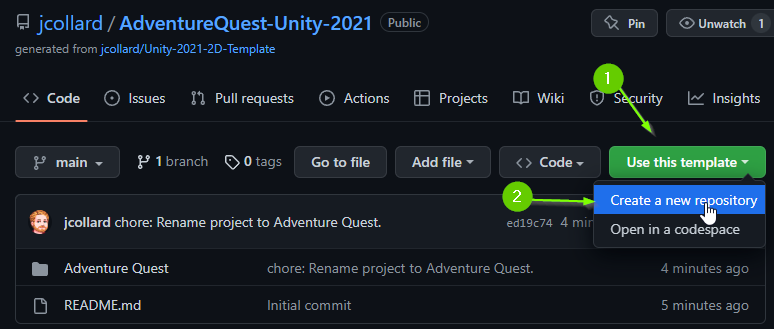
- Give your repository a name. I recommend calling it
AdventureQuest. - Click
Create repository from template
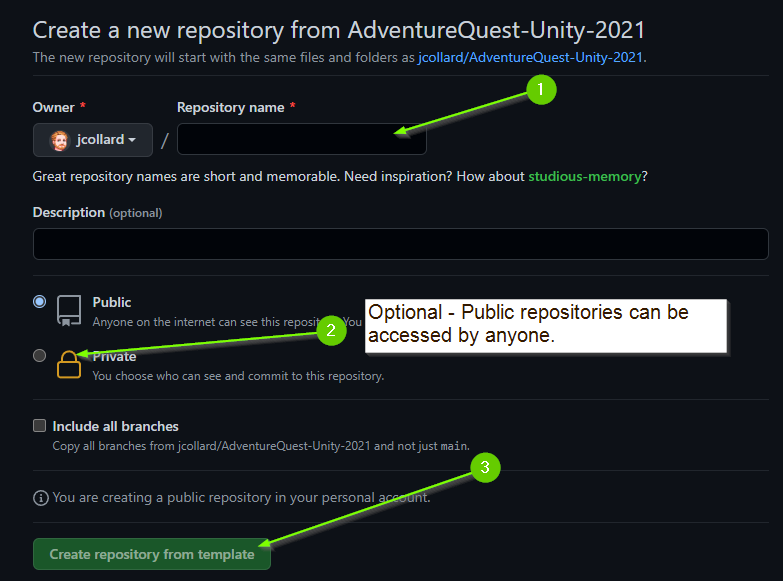
After a few second your copy of the template should be available. Next, you will clone the repository. I’ve provided instructions below for using GitHub Desktop. If you have a preferred way of cloning the repository, you can skip to 02. Adding Project to Unity Hub
- Click
Code>Open with GitHub Desktop
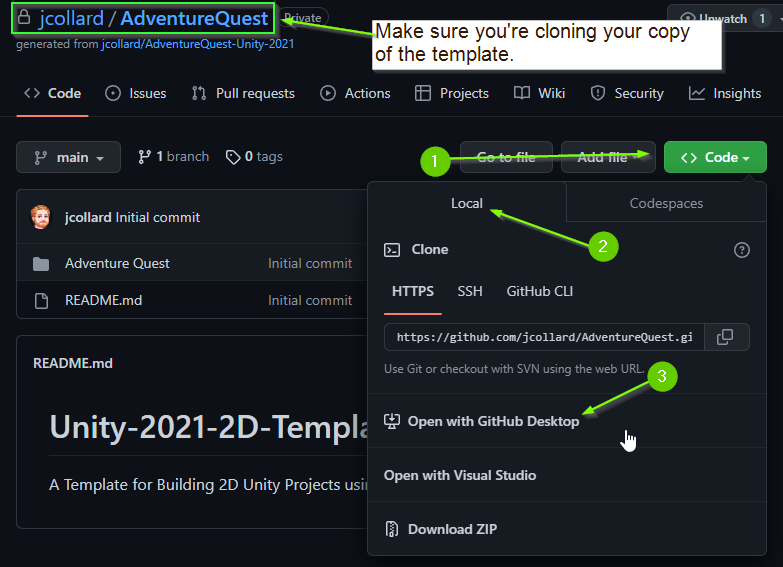
This should launch GitHub Desktop.
-
Take note of the
Local pathsetting. This is where the repository will be cloned. Optionally you can change theLocal pathsetting. -
Click
Clone
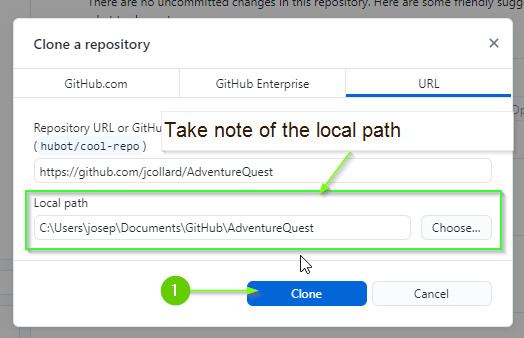
After a few moments, the template will be cloned to your computer.
Creating a Development branch
It is typically considered bad practice to work directly on your projects main branch. Instead, your team will typically have a development branch that will eventually be added to main when your project is ready to be released.
Before beginning, you should create a development branch. Below are instructions to create a branch using GitHub Desktop:
Creating a Branch with GitHub Desktop (Click to Expand)
- Select your project repository from the
Current repositorydrop down. - Click the
Current branchdrop down. - Click
New branch

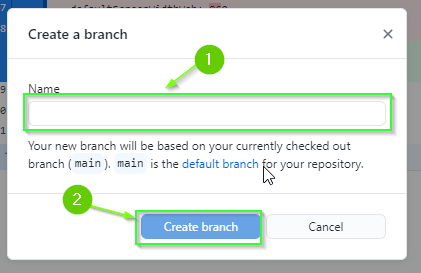
A dialog will open.
- Enter the name of the new branch (e.g.
development) - Click
Create branch
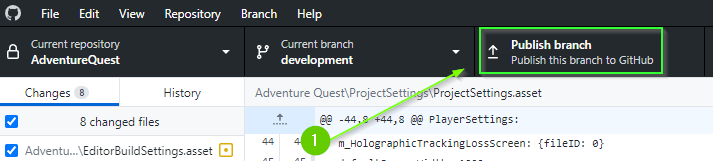
- Publish your branch to GitHub by clicking the
Publish branchbutton.
You are now ready for 02. Adding Project to Unity Hub
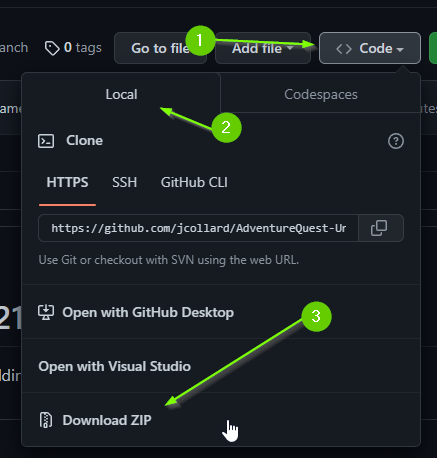
Option 2 - Download Zip (Not Recommended)
If you use this option, your project will not be connected to a GitHub repository and you will not be able to make incremental commits.
If you do not have a GitHub account, you can download the template as a ZIP by clicking Code > Download ZIP:
02. Adding Project to Unity Hub
Note: This guide was made using Unity Hub 3.4.1.
This project uses Unity 2021.3.16f1. Although this project should convert to any version of Unity 2021, I highly recommend downloading this version for compatibility.
- Open Unity Hub
- Click the
ProjectsTab - Click the arrow next to the
Openbutton. - Click
Add project from disk

- Navigate to your repository and select the folder within called “Adventure Quest”. This folder should contain a folder called
Assets.

- The
Adventure Questproject should now appear in Unity Hub. Double Click to open it.
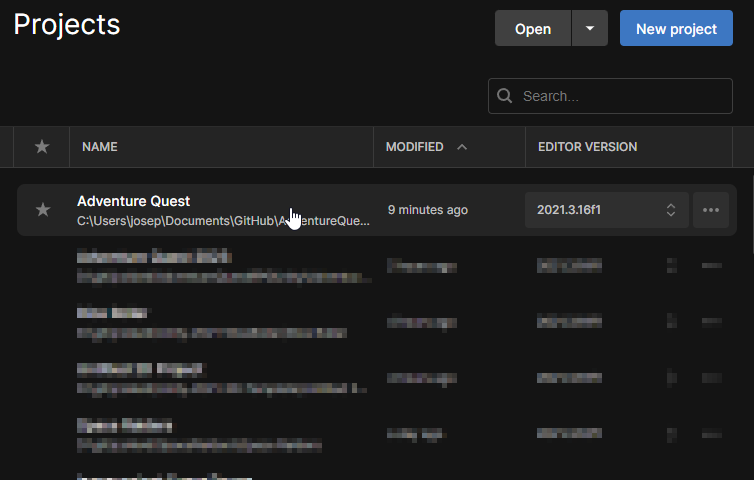
The first time the project is opened, it will take several minutes to load.
Good Time to Commit
Now would be a good time to make a git commit. You just finished a chore. More specifically, you just initialized the Adventure Quest Unity project.
Committing with GitHub Desktop (Click to Expand)
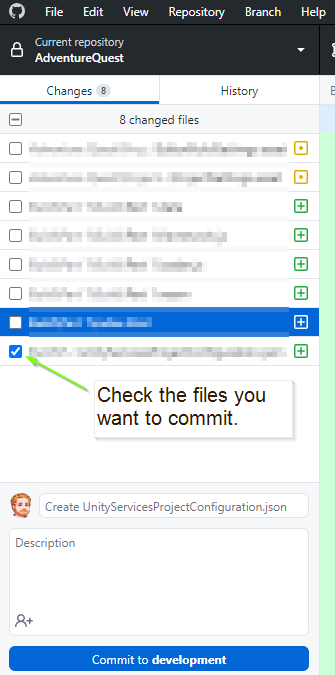
- Ensure the files you would like to commit are checked in the
Changestab.
-
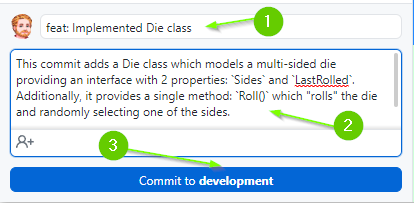
Enter a summary for your commit. Think of this as the subject line of an email. It should be SHORT and to the point. Aim to be less than 50 characters. It is good practice to prefix the commit with the type of work that was done. For example:
- A feature:
feat: Implemented Die class - A chore:
chore: Added image assets to project - A bug fix:
fix: Removed off by 1 error - A work in progress:
wip: Partial implementation of DieGroup class
- A feature:
-
Add a description to your commit. This should provide additional details about what is included in the commit. For example:
This commit adds a Die class which models a multi-sided die providing an
interface with 2 properties: `Sides` and `LastRolled`. Additionally, it provides
a single method: `Roll()` which "rolls" the die and randomly selecting one of
the sides.

Additionally, added unit tests to test the Die class specification.
- When you’re ready, click the
Commitbutton
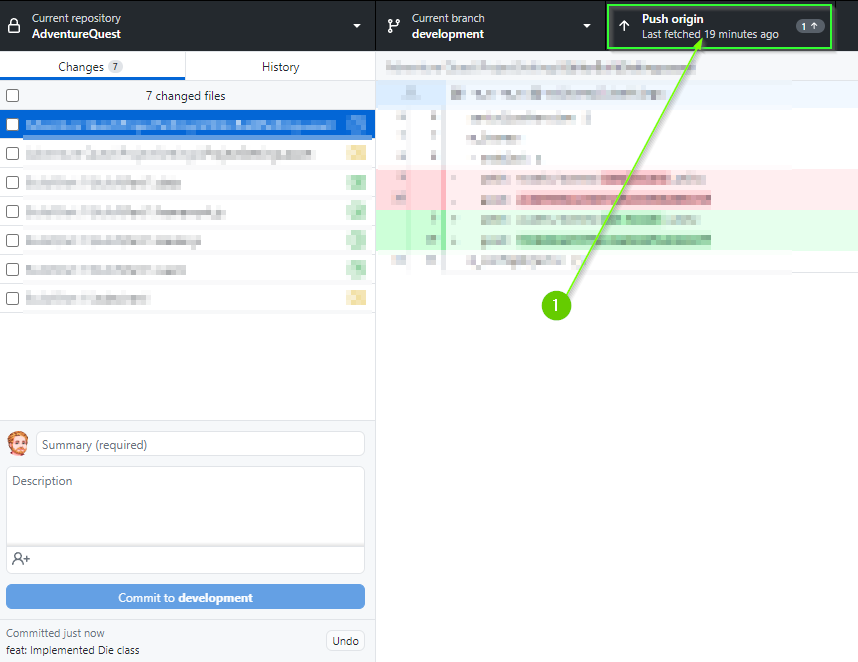
- Lastly, push your commit to GitHub by clicking the
Push originbutton
What’s next?
With the project setup and ready to go, you can proceed to 1: Creating A Die Roller.
Join the Discussion
If you're stuck, have questions, or want to provide feedback, you can do so below. However, I ask that you please refrain from posting complete solutions to any of the challenges.
Before commenting, you will need to authorize giscus. Alternatively, you can add a comment directly on the GitHub Discussion Board.