1.3: Adding an OnRoll Event
In this part, you will learn how to add UnityEvents to your scripts and update elements on the screen when a Die is rolled.
Before starting, you should finish the challenge at the end of [Chapter 2: Creating a Die Roller Scene] and have a scene that contains 6 Die Controllers as well as 6 buttons that can roll each Die.
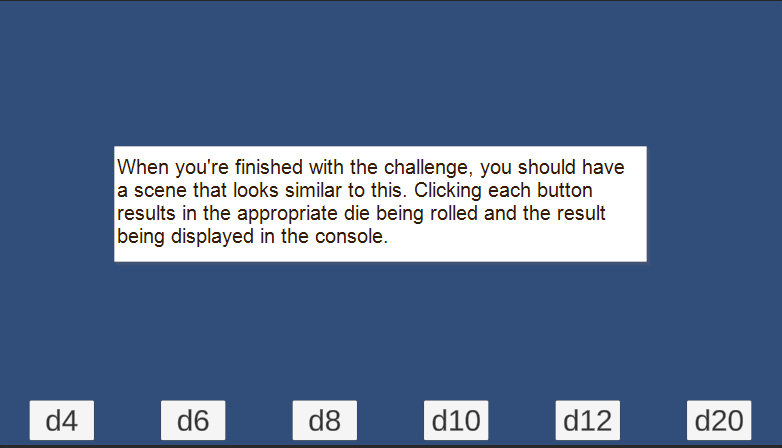
Table of contents
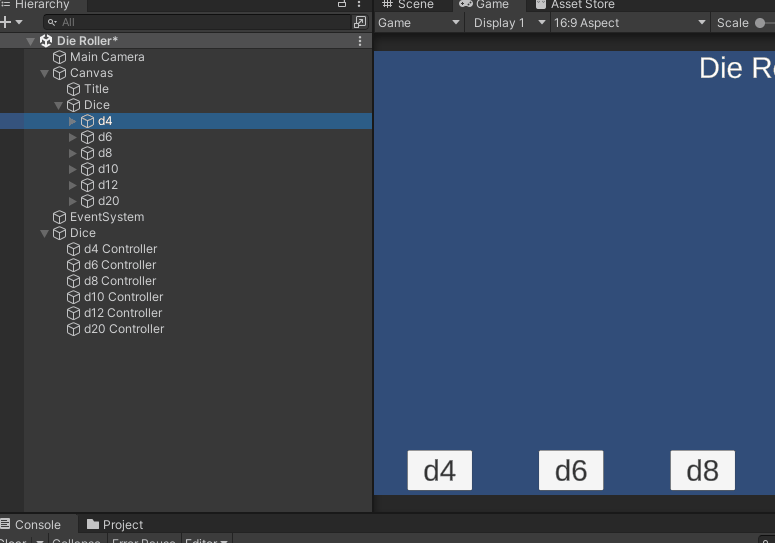
00. Organize Your Hierarchy
After completing the challenge for part 2, my Hierarchy looks like this:
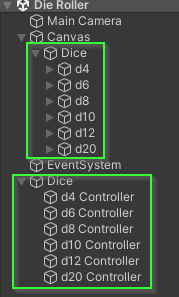
It is okay if your Hierarchy structure is different. However, throughout this section, I refer to the Hierarchy as if it has the structure above.
01. Adding a Text Component
We would like to have the result of the die being rolled to be displayed above the button that was clicked. To do this, we will add a text component to the screen.
For practice, let’s start by adding a “title” to the scene that says “Die Roller!”
- Right click on the
Canvasin yourHierarchy - Select
UI>Text - TextMeshPro - Rename the element to be called
Title
This is the same type of element as the text on the button’s you’ve added previously.
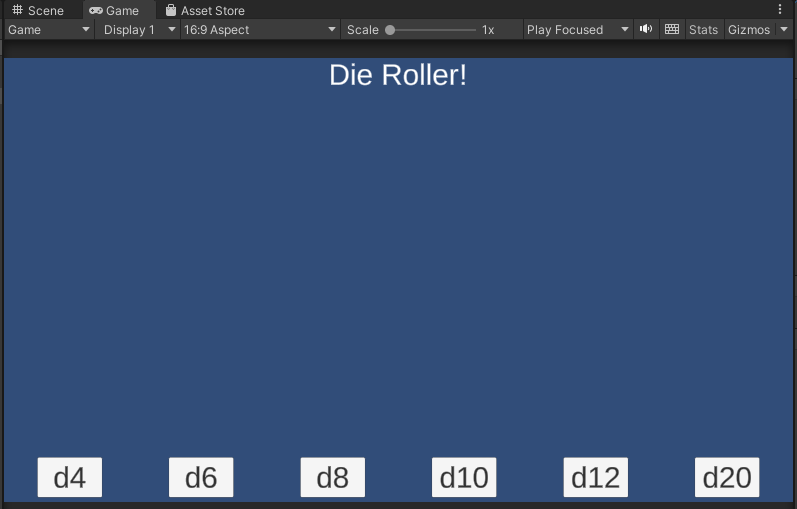
Challenge: Center Title at the Top of the Screen
- Update the
TextMeshPro - Textcomponent onTitle- Change the title to “Die Roller!”
- Update the font to be a size you find reasonable
- Update the
Rect Transformcomponent onTitle- Update the anchors and pivot to center it at the top of the screen
- Update the width and height appropriately.
When you’re finished, your scene should look similar to this:
02. Add a Result Label to a Die Button
Now that we have a little bit of practice with adding a text component to the UI. Let’s try adding a text component above the d4 button.
- Right click on the
d4button in theHierarchy - Select
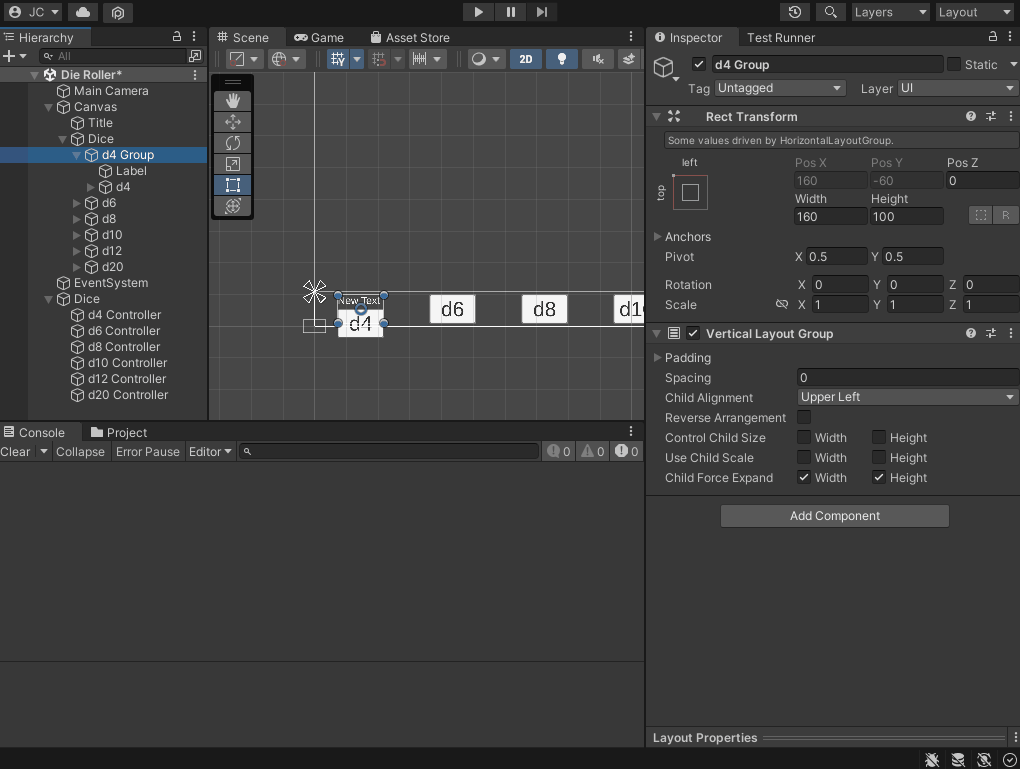
Create Empty Parent - Rename the new
GameObjectto bed4 Group
By doing this, we have “pushed” the d4 button inside of a new GameObject called d4 Group. This may have caused the d4 button to adjust its positioning within the d4 Group as it is no longer being controlled by the Horizontal Layout Group of its previous parent (Dice).
By default, when you create a parent object surrounding others, it will set its Rect Transform to encompass all of the inner object. However, the d4 within didn’t update its anchors / position appropriately. One fix would be to set the anchors / pivot of d4 to center in the parent. However, because we want to add a Text label within, we will instead add a Vertical Layout Group to d4 Group which will update the children appropriately.
- Select
d4 Groupfrom theHierarchy - In the
InspectorselectAdd Component - Search for
Vertical Layout Group - Add the component

After doing this, the button should “snap” back into place within the d4 Group. If it doesn’t you may need to adjust the size of the d4 Group to have a width and height that are at least as big as the d4 button.
Finally, let’s add a text component to the d4 Group
- Right click on the
d4 Group - Select
UI>Text - TextMeshPro - Rename the component
Label

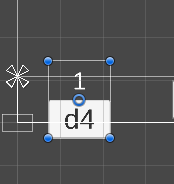
In my scene, the text is very small and is disappearing off the bottom of the scene. I would like the text to be a little bigger and centered above the button.
- Move the
Labelabove thed4in thed4 Group

This will change the order they are added to the Vertical Group
- Select the
Labelin theHierarchy - Find the
TextMeshProcomponent in theInspector - Update the text to “1”
- Update the font size to look “nice” (I’ve chosen 64)
- You may need to update the
Heightof theRect Transformto match.
- You may need to update the
- Update the
AlignmenttoCenter
Lastly, let’s update the spacing and alignment of the Vertical Layout Group to make the children look a little nicer:
- Select
d4 Groupin theHierarchy - Find the
Vertical Layout Groupin theInspector - Adjust the spacing and alignment until you like the way it looks.
- The image below shows the settings I chose:

After making these changes, my d4 Group was too big to fit inside the Dice parent which caused it to go off the bottom of the scene again:
To fix this, you may need to update the height of the Dice parent to match the height of the d4 Group.
Here is what the Scene looks like at this point:
03. Adding an OnRoll listener to DieController
Next, we would like to be able to update the text of the button any time the d4 Controller rolls. To do this, we are going to add a UnityEvent to the DieController class. To use UnityEvents we need to use the UnityEngine.Events name space.
- Update the
DieController.csfile to use theUnityEngine.Eventsname space.
using UnityEngine;
using UnityEngine.Events; // <-- Required to use UnityEvents

namespace AdventureQuest.Dice
{
    public class DieController : MonoBehaviour { // omitted for brevity }
}
- Update the
DieControllerclass to have aUnityEvent<string>property namedOnRollString. OnRollStringshould bepublicwith agetandprivate set
public class DieController : MonoBehaviour
{
    public UnityEvent<string> OnRollString { get; private set; }
    [field: SerializeField]
    public int Sides { get; private set; } = 6;
    // omitted for brevity
}
- To access it from the
Inspectoradd a[field: SerializeField]attribute.
[field: SerializeField]
public UnityEvent<string> OnRollString { get; private set; }
A UnityEvent allows other elements of the game to “listen” for events to occur. When we specify UnityEvent<string> we are creating an event that will produce an string. In this case, that string will be the value that was rolled. Thus, any object listening will not only know that the die was rolled BUT also what the result was.
To trigger the event, we need to add it to the Roll() method.
- Update the
Roll()method to callOnRoll.Invoke(_die.LastRolled.ToString())
public void Roll()
{
    _die.Roll();
    OnRollString.Invoke(_die.LastRolled.ToString());
}
This line of code converts the _die.LastRolled value to a string and then sends the resulting string to all of the “listeners” of the OnRollString event.
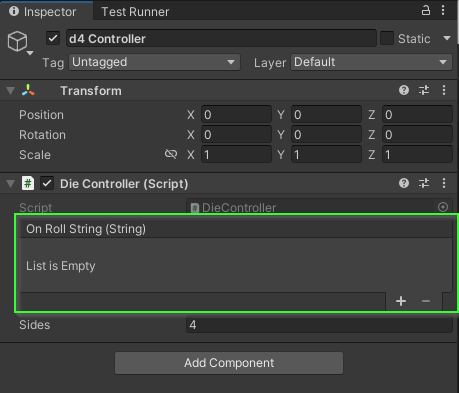
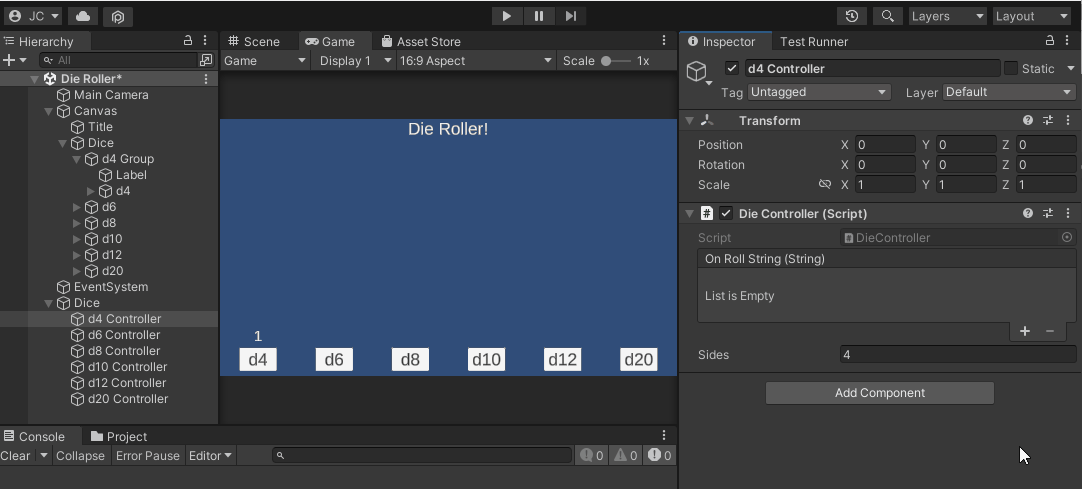
If all went well, you should be able to find the OnRollString event in the Inspector.
- Select
d4 Controllerfrom theHierarchy - Find the
DieControllercomponent
Let’s add the d4 Group’s Label as a listener:
- Click the
+icon on theOnRollStringevent. - Drag the
Labelinto theNone (Object)slot
Lastly, we need to set the function to set the text to match the result.
- Click the function drop down menu
- Select
TextMeshProUGUI>text- Be sure to select the
textoption that is listed toward the top under theDynamic stringsection.
- Be sure to select the

When the OnRollString event is invoked, it will send the string to the Label which then uses that string to update its text property.
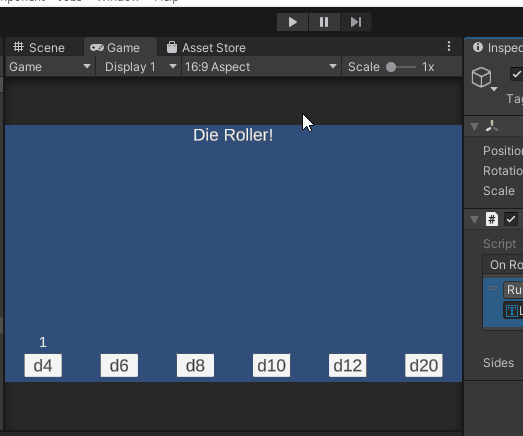
Test it Out
If all went well, you should now be able to run your program, click the d4 button and see the text update. Give it a try!
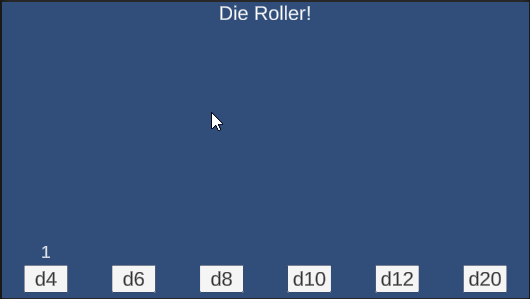
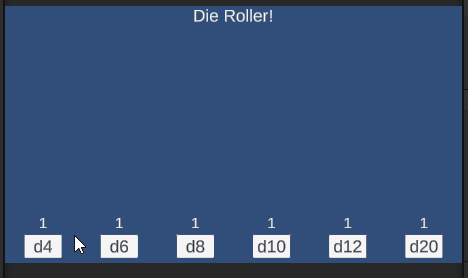
Challenge: Add Die Labels to All Buttons
Can you update your scene such that each die button has a label that updates when it is clicked?
When you’re done, your scene should look and act similar to this:
Good Time to Commit
Now would be a good time to make a git commit. You just finished a feature. More specifically, you just added a OnRollString event to the DieController. Before committing, be sure you save your Die Roller scene (Unity doesn’t auto save for you).
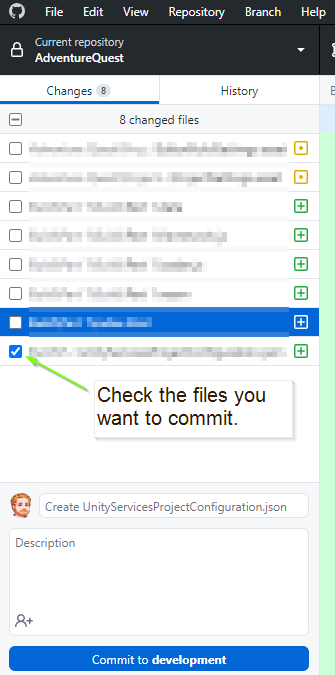
Committing with GitHub Desktop (Click to Expand)
- Ensure the files you would like to commit are checked in the
Changestab.
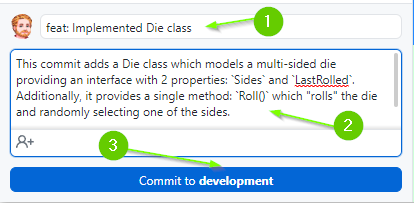
-
Enter a summary for your commit. Think of this as the subject line of an email. It should be SHORT and to the point. Aim to be less than 50 characters. It is good practice to prefix the commit with the type of work that was done. For example:
- A feature:
feat: Implemented Die class - A chore:
chore: Added image assets to project - A bug fix:
fix: Removed off by 1 error - A work in progress:
wip: Partial implementation of DieGroup class
- A feature:
-
Add a description to your commit. This should provide additional details about what is included in the commit. For example:
This commit adds a Die class which models a multi-sided die providing an
interface with 2 properties: `Sides` and `LastRolled`. Additionally, it provides
a single method: `Roll()` which "rolls" the die and randomly selecting one of
the sides.

Additionally, added unit tests to test the Die class specification.
- When you’re ready, click the
Commitbutton
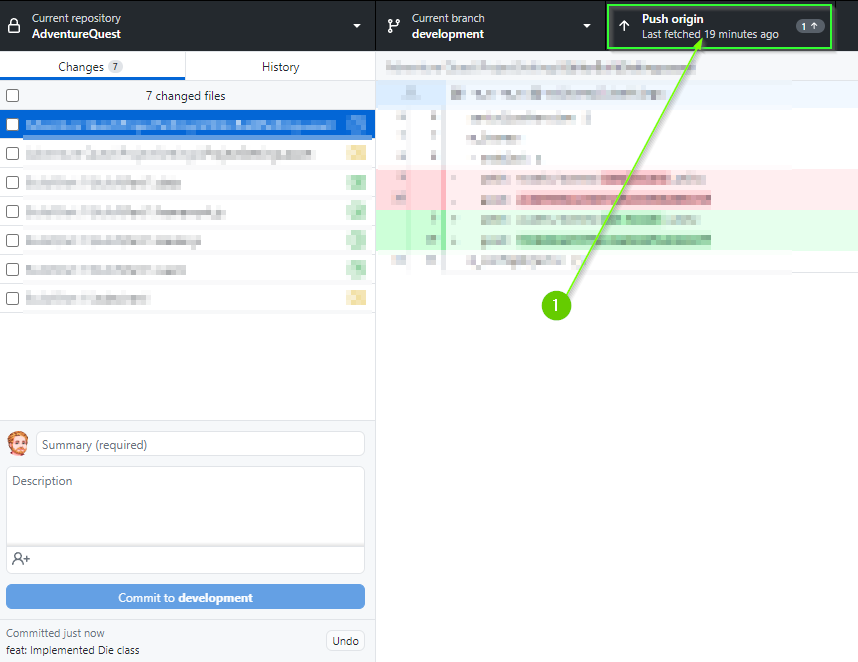
- Lastly, push your commit to GitHub by clicking the
Push originbutton
What’s Next?
If you’ve completed the challenge, you may have felt that “wiring” up all the labels, controllers, and buttons was incredibly tedious. If you decide to make changes to the buttons in the future, it will be painful to update all of them again. In the next section, we will learn how to create a Prefab for a Die Button to make it easy to add new buttons and more importantly update old buttons!
After you have completed the challenge, you should proceed to [Chapter 4: Creating a Die Button Prefab]
Join the Discussion
If you're stuck, have questions, or want to provide feedback, you can do so below. However, I ask that you please refrain from posting complete solutions to any of the challenges.
Before commenting, you will need to authorize giscus. Alternatively, you can add a comment directly on the GitHub Discussion Board.